← Amphonix 2 CFW Manual
// manual
User manual
Test build CFW 0.2 · web app
What every feature of the Amphonix 2 custom firmware (CFW) does, and how to use it: on the unit and in the SonicMaster CFW web app.
Unofficial community project, not affiliated with or endorsed by Sonicake. Use the CFW at your own risk: see Safety first.
// 01
Getting started NEW
since CFW 0.2
What the CFW is
The Amphonix 2 CFW is an unofficial custom firmware for the Sonicake Amphonix 2 (QAP-50) headphone amp, built on the official firmware V1.0.2. Everything the unit already does keeps working; the CFW adds features on top. The Amphonix 2 runs the Pocket Master firmware family without a screen and footswitches, so the CFW comes from the makers of the Pocket Master and Smart Box CFW.
Its editor is the SonicMaster CFW web app, the same one as for the Pocket Master and the Smart Box. It runs in the browser (or installed as an app) and talks to the unit over USB or Bluetooth. Scenes, long names, the tuner and the CFW settings are done there. Sonicake Manager is only needed to flash the firmware.
What's in CFW 0.2 NEW
- The A / B / C keys: 3 presets per key as stock, or 5 per key (P01–P15); hold a key for the scenes.
- Scenes (snapshots) BASE / SC1 / SC2 per preset, with blocks on / off, and STOMP groups.
- The tuner in the web app, also over USB, with A4 and Mute / Bypass saved and the bass fix.
- 10 User IR + 10 NAM slots with 30-character names (your stock 5 + 5 are kept) and safer uploads.
- IR after NAM: the IR block plays after a NAM capture.
- The DSP load meter in the web app, and a steadier USB link.
- MIDI control over USB and Bluetooth: presets, blocks, STOMP, scenes, tuner and volume, with the Pocket Master CC numbers.
Safety first
What you need
- An Amphonix 2 with the official firmware V1.0.2, a USB-C data cable and a Windows computer with Sonicake Manager for the flash.
- For the web app: Chrome, Edge or Opera on a computer, Chrome on Android, Bluefy on iPhone / iPad (Bluetooth).
// 02
Installing and updating NEW
since CFW 0.2
No release yet. These are the steps for the first release; the download appears on the main page.
- Back up: in the web app, Backup & restore → Backup; keep your IR
.wavand NAM files. - Close every app that talks to the unit and open Sonicake Manager.
- Put the unit in update mode: unplug USB, then press and hold volume +, volume − and the power key together until all lights are on. Then only the power key's LED stays on, white / light blue: that is update mode. Plug USB back in.
- Click Firmware Update, pick
Amphonix2_CFW0.2_base1.0.2.binand wait for the progress bar, as with the official firmware. Check its SHA-256 against the release notes first. - Windows 11: if the update stalls, open Device Manager and give the update-mode device the “USB Audio Device” driver.
- The unit restarts. The first boot takes a moment longer: the CFW reorganises the IR and NAM stores (your 5 + 5 are kept).
- Connect the web app: it shows Amphonix 2 CFW 0.2.
Updating
Every later version is one file too, flashed the same way. Your presets, slots and settings stay.
If something goes wrong
- The unit does not start, or the update does not start: unplug USB, hold volume +, volume − and power together until all lights are on; when only the power LED stays on (white / light blue) the unit is in update mode (in the boot loader). Plug USB back in and flash the official V1.0.2 with Sonicake Manager.
- A refused or broken DSP part makes the unit enter update mode by itself: flash the official V1.0.2 the same way.
// 03
The A / B / C keys NEW
since CFW 0.2 web app setting
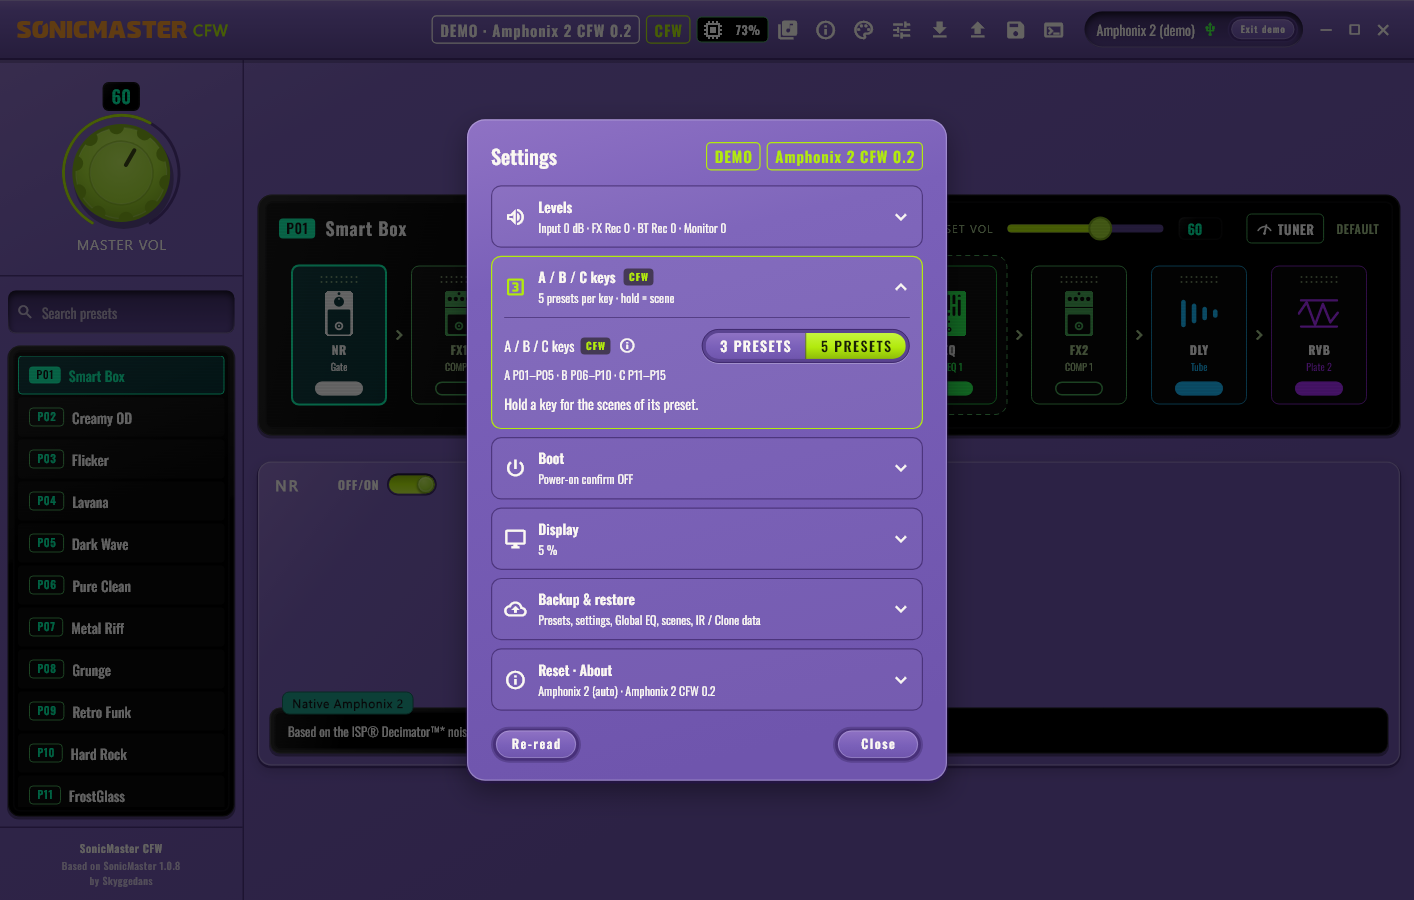
The three keys choose presets, and each key's LED shows which one plays. The mode is set in the web app: Settings → A / B / C keys (saved in the unit).
| Mode | A | B | C |
|---|---|---|---|
| 3 PRESETS (default) | P01–P03 | P04–P06 | P07–P09 |
| 5 PRESETS | P01–P05 | P06–P10 | P11–P15 |
LED: 3 PRESETS (default) = the three stock colours · 5 PRESETS = the three stock colours + two mixed ones.
- Click the key of the preset that plays: the next preset of that key, then back to its first.
- Click another key: its first preset in 5 PRESETS; in 3 PRESETS the keys work exactly as on the original firmware.
- A preset chosen in the web app lights its key if it belongs to one (P01–P15 in 5 PRESETS); otherwise no key is lit.
Hold a key: scenes
- Hold the key of the preset that plays: the next scene, BASE → SC1 → SC2 → BASE (a scene without settings is skipped).
- Hold another key: its preset loads and plays its SC1 at once.
- The key LED blinks once for BASE, twice for SC1, three times for SC2.
- A preset without scenes: holding its key does nothing.
+ / − (volume), + and − together (mute) and the power key work as on the original firmware.
// 04
Scenes (snapshots) NEW
since CFW 0.2
A scene (snapshot) is a second or third sound of the same preset: BASE is the preset as saved, SC1 and SC2 change chosen knobs and switch blocks on or off. Switching scenes changes no preset, so there is no gap. Scenes are the same as on the Pocket Master and Smart Box CFW.
- In the web app, switch SCENES on for the blocks that should change, pick SC1 or SC2 and set their knobs; switch blocks on or off for the scene; save the preset.
- On the unit, hold the key of that preset: SC1 (2 blinks), hold again: SC2 (3 blinks), again: BASE (1 blink).
- A block switched on or off while SC1 or SC2 plays is stored in that scene.
- Blocks of a STOMP group are never switched by a scene.
- A preset change starts on BASE.
- By MIDI: CC 82 = SC1, CC 83 = SC2, CC 85 = BASE; with Same preset again = CYCLE, selecting the current preset again steps BASE → SC1 → SC2 (see MIDI).
// 05
STOMP groups NEW
since CFW 0.2
Two groups of blocks, FS1 and FS2, per preset: each group switches its blocks on and off together (if any is on, all go off; else all go on). Assign the blocks in the web app. The Amphonix 2 has no footswitches: the groups are switched by MIDI (CC 80 / 81), the only way on this unit; see MIDI.
A STOMP switch never marks the preset as changed, and scenes leave the STOMP blocks alone.
// 06
The tuner in the web app NEW
since CFW 0.2 web app
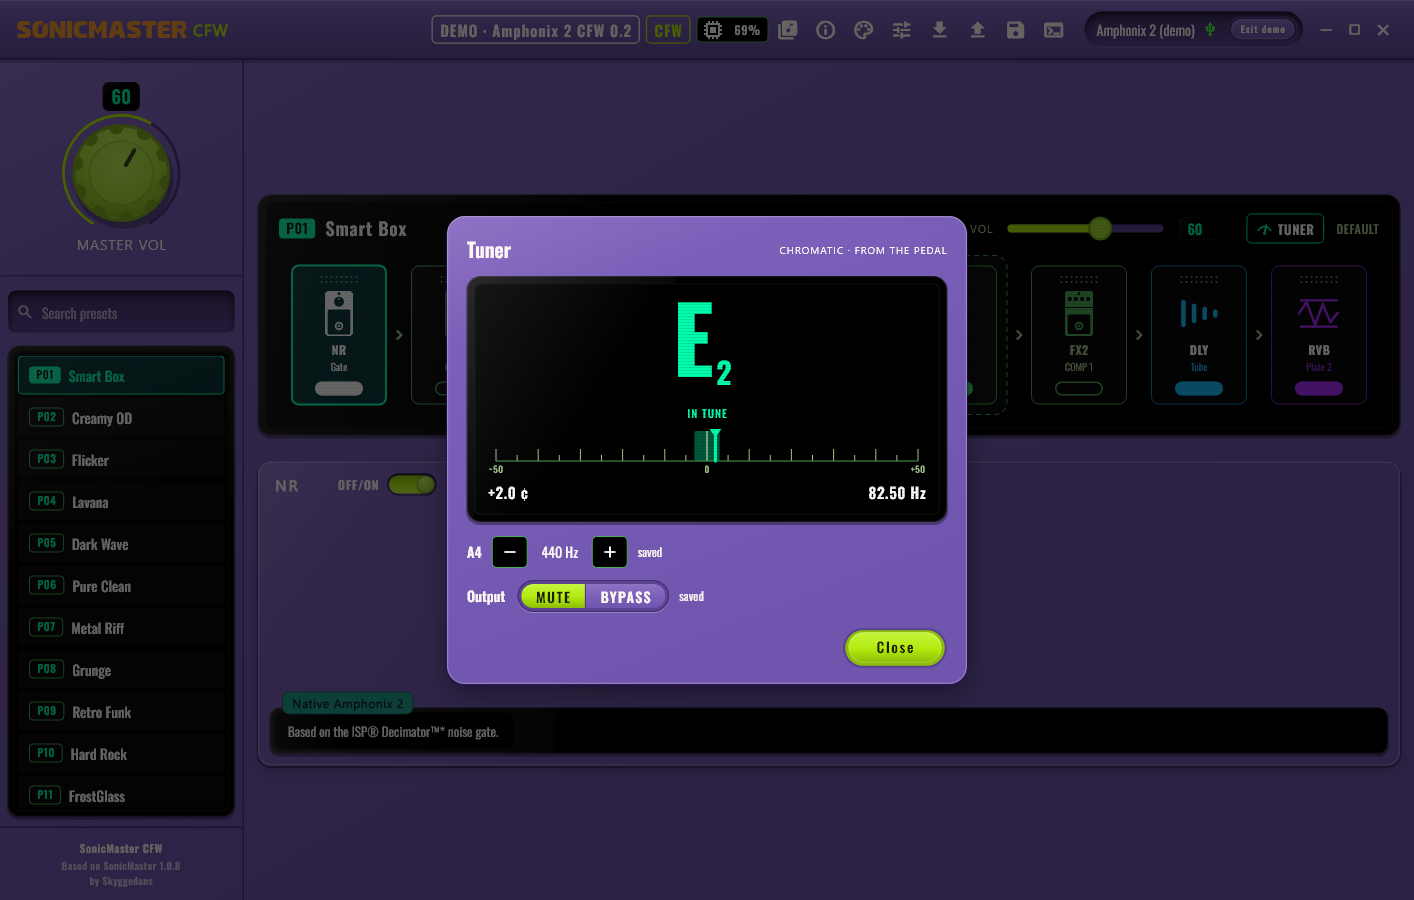
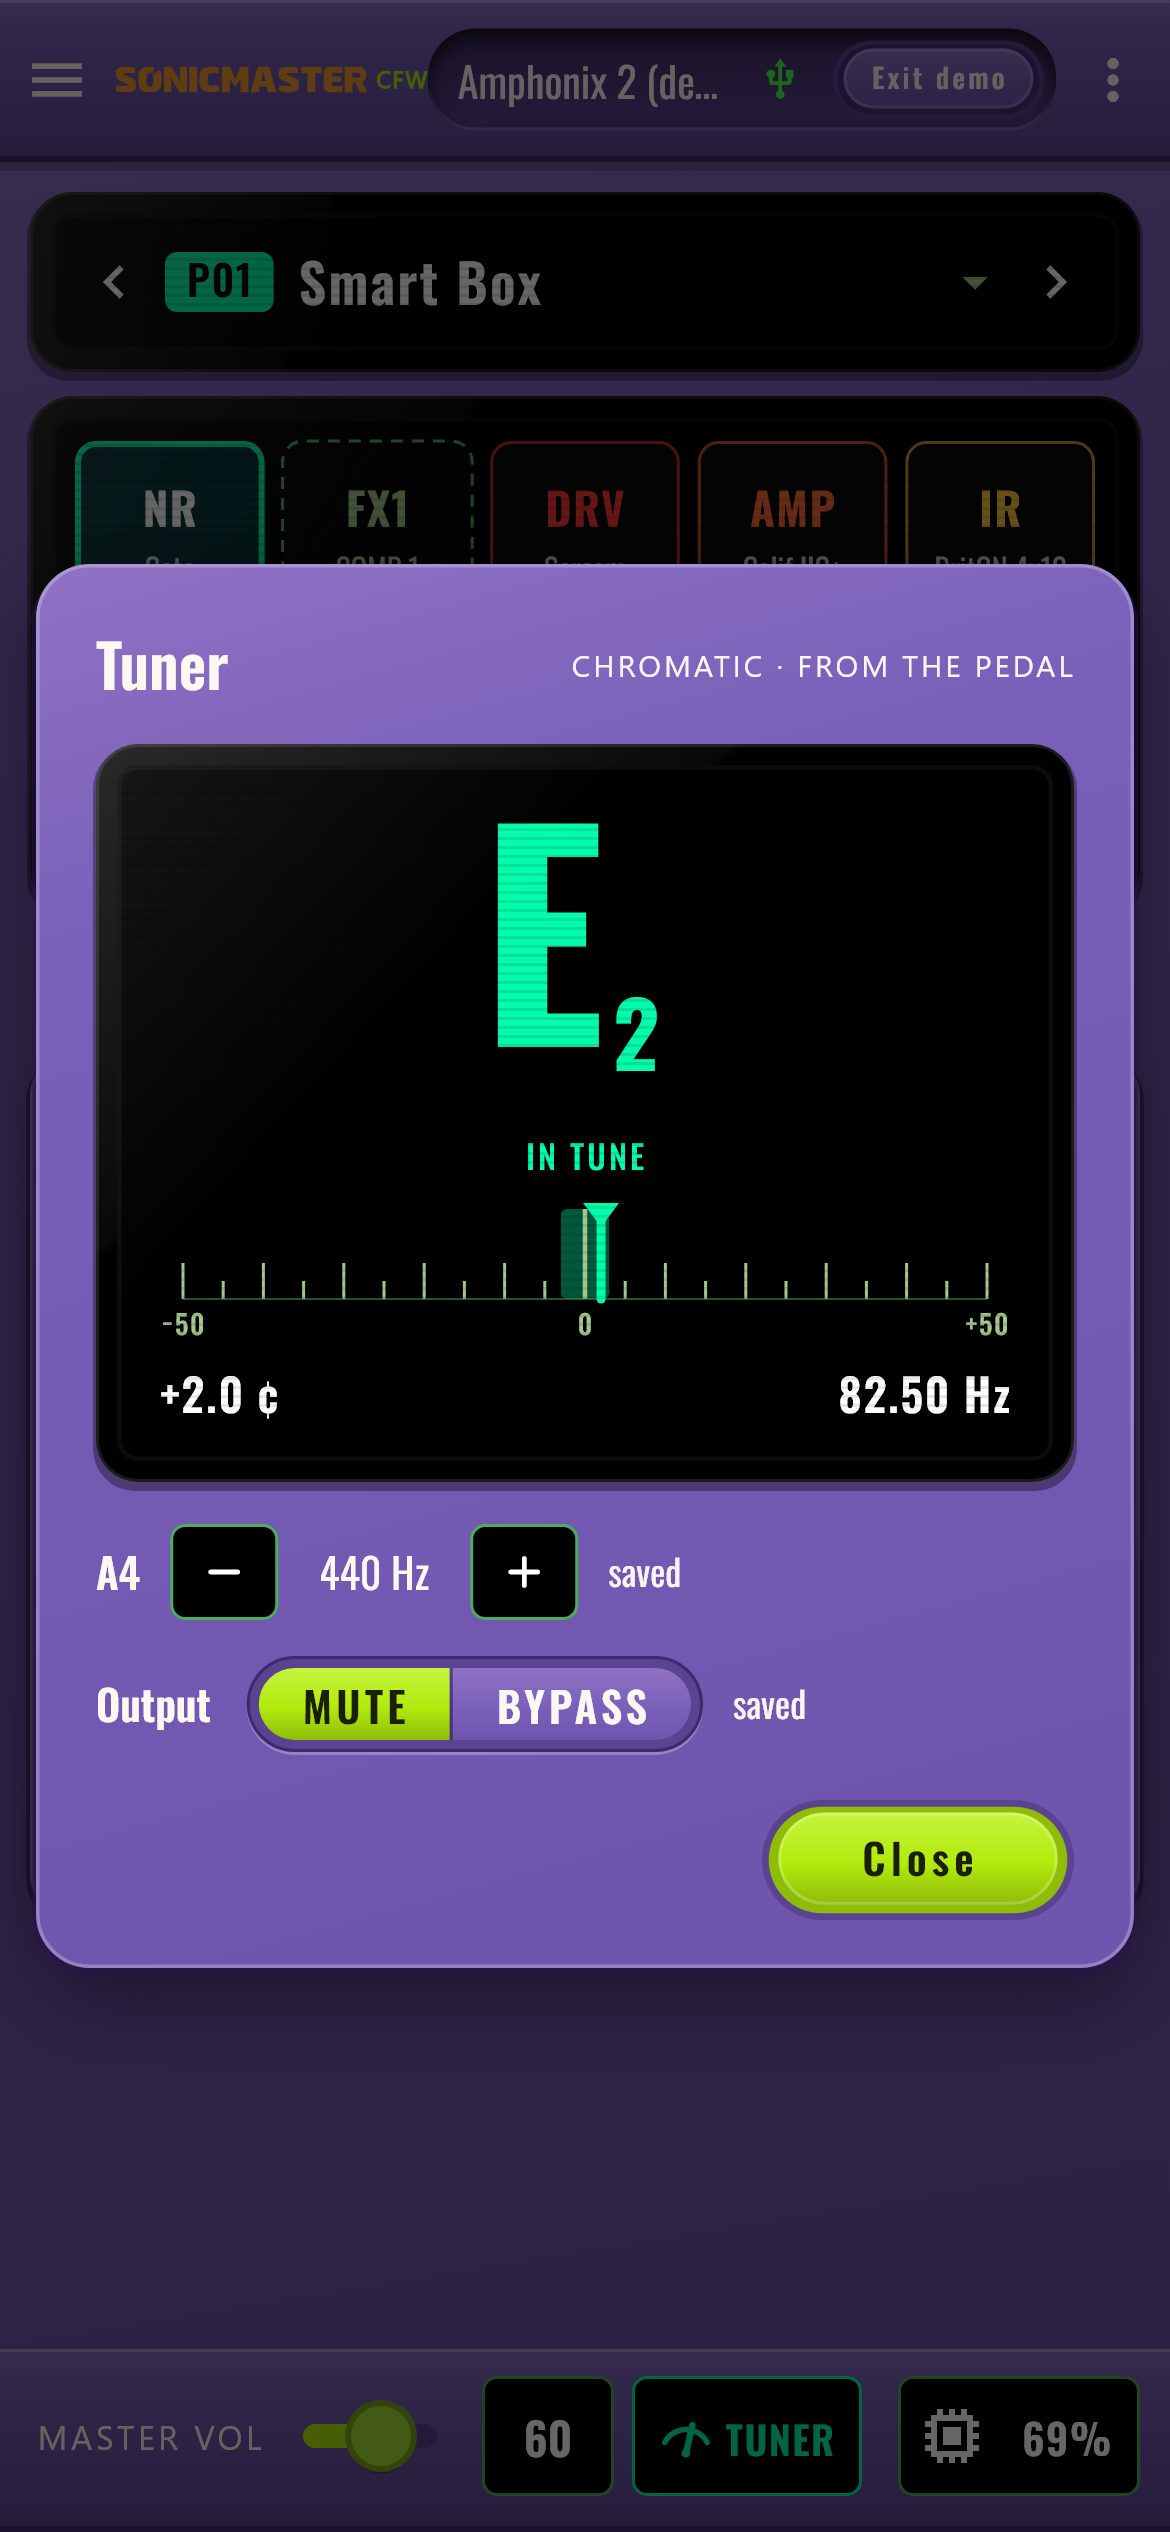
The Amphonix 2 has no screen: its tuner shows in the web app. Click TUNER (the footer chip on a phone, the button in the preset bar on a computer). The unit opens its tuner and the app mirrors it: the note, a cents needle with the ±3-cent in-tune window, the Hz and A4. Close ends it.
- Over USB too: the original firmware shows its tuner only over Bluetooth.
- A4 430–450 Hz, saved in the unit.
- Output: Mute (silent while tuning) or Bypass (the dry guitar), saved.
- Bass: low notes down to B0 lock and read right (the original tuner reads them sharp: in the emulator E1 about +40 cents, B0 shown as C1; with the CFW E1 +0.1 and B0 −2.2 cents). A bass note with a very weak fundamental may not lock: the app then shows an averaged note. Measured in the emulator, still to be confirmed on the unit.
- A tuner opened by MIDI stays open until MIDI closes it.
- If the app goes away (USB unplugged, browser closed) while the tuner is open, the unit goes back to normal sound by itself after about 5 seconds.
- While the tuner is open the app selects no preset.
// 07
IR and NAM slots NEW
since CFW 0.2
- 10 User IR slots (User IR 1–10 in the IR block) and 10 NAM (Clone) slots, instead of 5 + 5.
- Names up to 30 characters, set in the web app. Sonicake Manager and SONICLINK show the first 15 characters.
- From the stock firmware: your 5 User IRs and 5 NAM captures are kept, with their names, in slots 1–5; slots 6–10 start empty.
- Safer uploads: an interrupted IR or NAM upload is refused cleanly, the next one works without a power cycle (the original firmware could shift it).
- A deleted NAM slot no longer risks another capture after a later upload (a bug of the original firmware).
// 08
IR after NAM NEW
since CFW 0.2
In a NAM preset, switch the IR block on and pick a factory cab or a User IR: it plays after the capture, so an amp-only capture gets its cab. IR VOL works as usual. Nothing new to learn: the same IR block, the same commands.
- IR block off, or an empty User IR slot: the capture plays alone, as on the original firmware.
- Note: a NAM preset that already had its IR block on now plays that cab too. Switch the IR block off for a full-rig capture.
- It costs DSP time (about 13 % in the emulator): watch the DSP meter with heavy presets.
// 09
DSP load meter NEW
since CFW 0.2 web app
The chip with the DSP icon in the web app shows how much of its time the DSP uses for the preset that plays, once per second. Near 100 % the sound can crackle: switch off a block or choose lighter models. The unit measures only while the app asks for it, and not while the tuner is open or during an upload.
// 10
MIDI NEW
since CFW 0.2 web app setting
The original firmware ignores every MIDI note and controller. With the CFW the Amphonix 2 listens to CC, Program Change and notes over USB-MIDI and Bluetooth MIDI (the editor's own messages are never filtered).
Settings (web app → Settings → MIDI)
- MIDI channel: ALL (default) or 1–16.
- MIDI map: Stock (default), Custom, Generic or Chocolate; map options for the Custom map.
- Same preset again: OFF, CYCLE (BASE → SC1 → SC2) or BACK.
What MIDI does on the Amphonix 2
- Presets: P01–P50 directly, bank ±10 and preset ±1 (both wrap around).
- Tuner on / off, also over USB; a tuner opened by MIDI stays open until MIDI closes it.
- Blocks NR … RVB on / off.
- STOMP FS1 / FS2 (CC 80 / 81): the only way to switch the STOMP groups on the Amphonix 2.
- Scenes SC1 / SC2 / BASE (CC 82 / 83 / 85).
- Volume: master (CC 7) and preset (CC 6).
Not on the Amphonix 2: tap tempo, looper, drum, knob roles, MIDI pedals A–D, Global EQ.
The maps
| Map | What it is |
|---|---|
| Stock | The default: the Pocket Master CC numbers, so the Pocket Control “Pocket Master” banks and other Pocket Master setups send the same numbers. CC 1 preset, CC 6 / 7 volume, CC 22–25 bank and preset ±, CC 43–51 blocks, CC 58 tuner, CC 80 / 81 STOMP, CC 82 / 83 / 85 scenes. |
| Generic | Program Change controllers: PC 1 = P01. |
| Chocolate | For the M-VAVE Chocolate: PC 0 = P01. |
| Custom | Your own table, made in the web app and stored in the unit. |
// 11
Web app NEW
web app
The SonicMaster CFW web app recognises the Amphonix 2 by itself (USB port “Amphonix 2 MIDI”, Bluetooth “Amphonix 2 BLE”) and shows one bank of 50 presets (P01–P50) and the Pocket Master models without AC G. With CFW 0.2 it also offers:
- the tuner, the DSP meter, the scenes editor, the STOMP groups;
- Settings → A / B / C keys (the keys);
- all 10 + 10 slots with 30-character names, NAM conversion and TONE3000;
- the MIDI settings (Settings → MIDI) with the Custom map editor;
- a steadier USB link: every reply leaves at a safe moment, so long sessions do not lose answers.
It never offers a Pocket Master or Smart Box firmware to an Amphonix 2. Close Sonicake Manager before connecting: only one app at a time can talk to the unit.
// 12
Backup and going back NEW
- Backup: web app → Backup & restore → Backup: the 50 presets and the settings, in one file for the Amphonix 2. Keep your IR and NAM files too.
- Going back: flash the official V1.0.2 with Sonicake Manager. The IR and NAM slots then show empty: the data stays in the unit, and installing the CFW again brings them back.
- Presets made with scenes play their BASE on the original firmware.
// 13
Troubleshooting / FAQ NEW
The web app does not see the unit
Close Sonicake Manager, use Chrome, Edge or Opera, and a data cable (not a charge-only one). On Windows look for “Amphonix 2 MIDI”.
The firmware update does not start
Put the unit in update mode first: unplug USB, hold volume +, volume − and power together until all lights are on and wait until only the power LED stays on (white / light blue), then plug USB back in and click Firmware Update in Sonicake Manager.
The update stalls on Windows 11
Device Manager → the update-mode device → update the driver → “USB Audio Device”, then start the update again.
Holding a key does nothing
The preset has no scenes yet: make them in the web app (Scenes) and save the preset.
The tuner closed by itself
The app stopped asking for 5 seconds (unplugged, browser in the background): the unit returns to normal sound so it never stays muted.
My NAM preset sounds different
Its IR block is on, so the cab now plays after the capture: switch the IR block off (IR after NAM).
// 14
How to report a bug
Tell us the CFW version (the web app shows it), what you did, what you expected and what happened, and the web-app version. A preset file or a short video helps a lot.